
If you’re a web developer, you probably care a lot about making your server faster and having full control over PHP settings. Maybe you want to allow bigger file uploads, make your scripts run better, or change how errors are shown on your site. Normally, all these changes happen in the main php.ini file, which is like the control center for PHP. But in most shared hosting accounts, you can’t edit that file directly.
No problem! You can still customize PHP settings for your own sites by using a simple file called .user.ini. This file lets you change PHP rules just for your folders (directories) without touching the server’s main settings.
Before we talk about the .user.ini file, let’s first look at how to switch your PHP version in the DirectAdmin panel on AxSpace.
How to Switch PHP Versions:
To change the PHP version for a domain, follow these simple steps in the DirectAdmin panel on AxSpace:
- Log in to your DirectAdmin control panel.
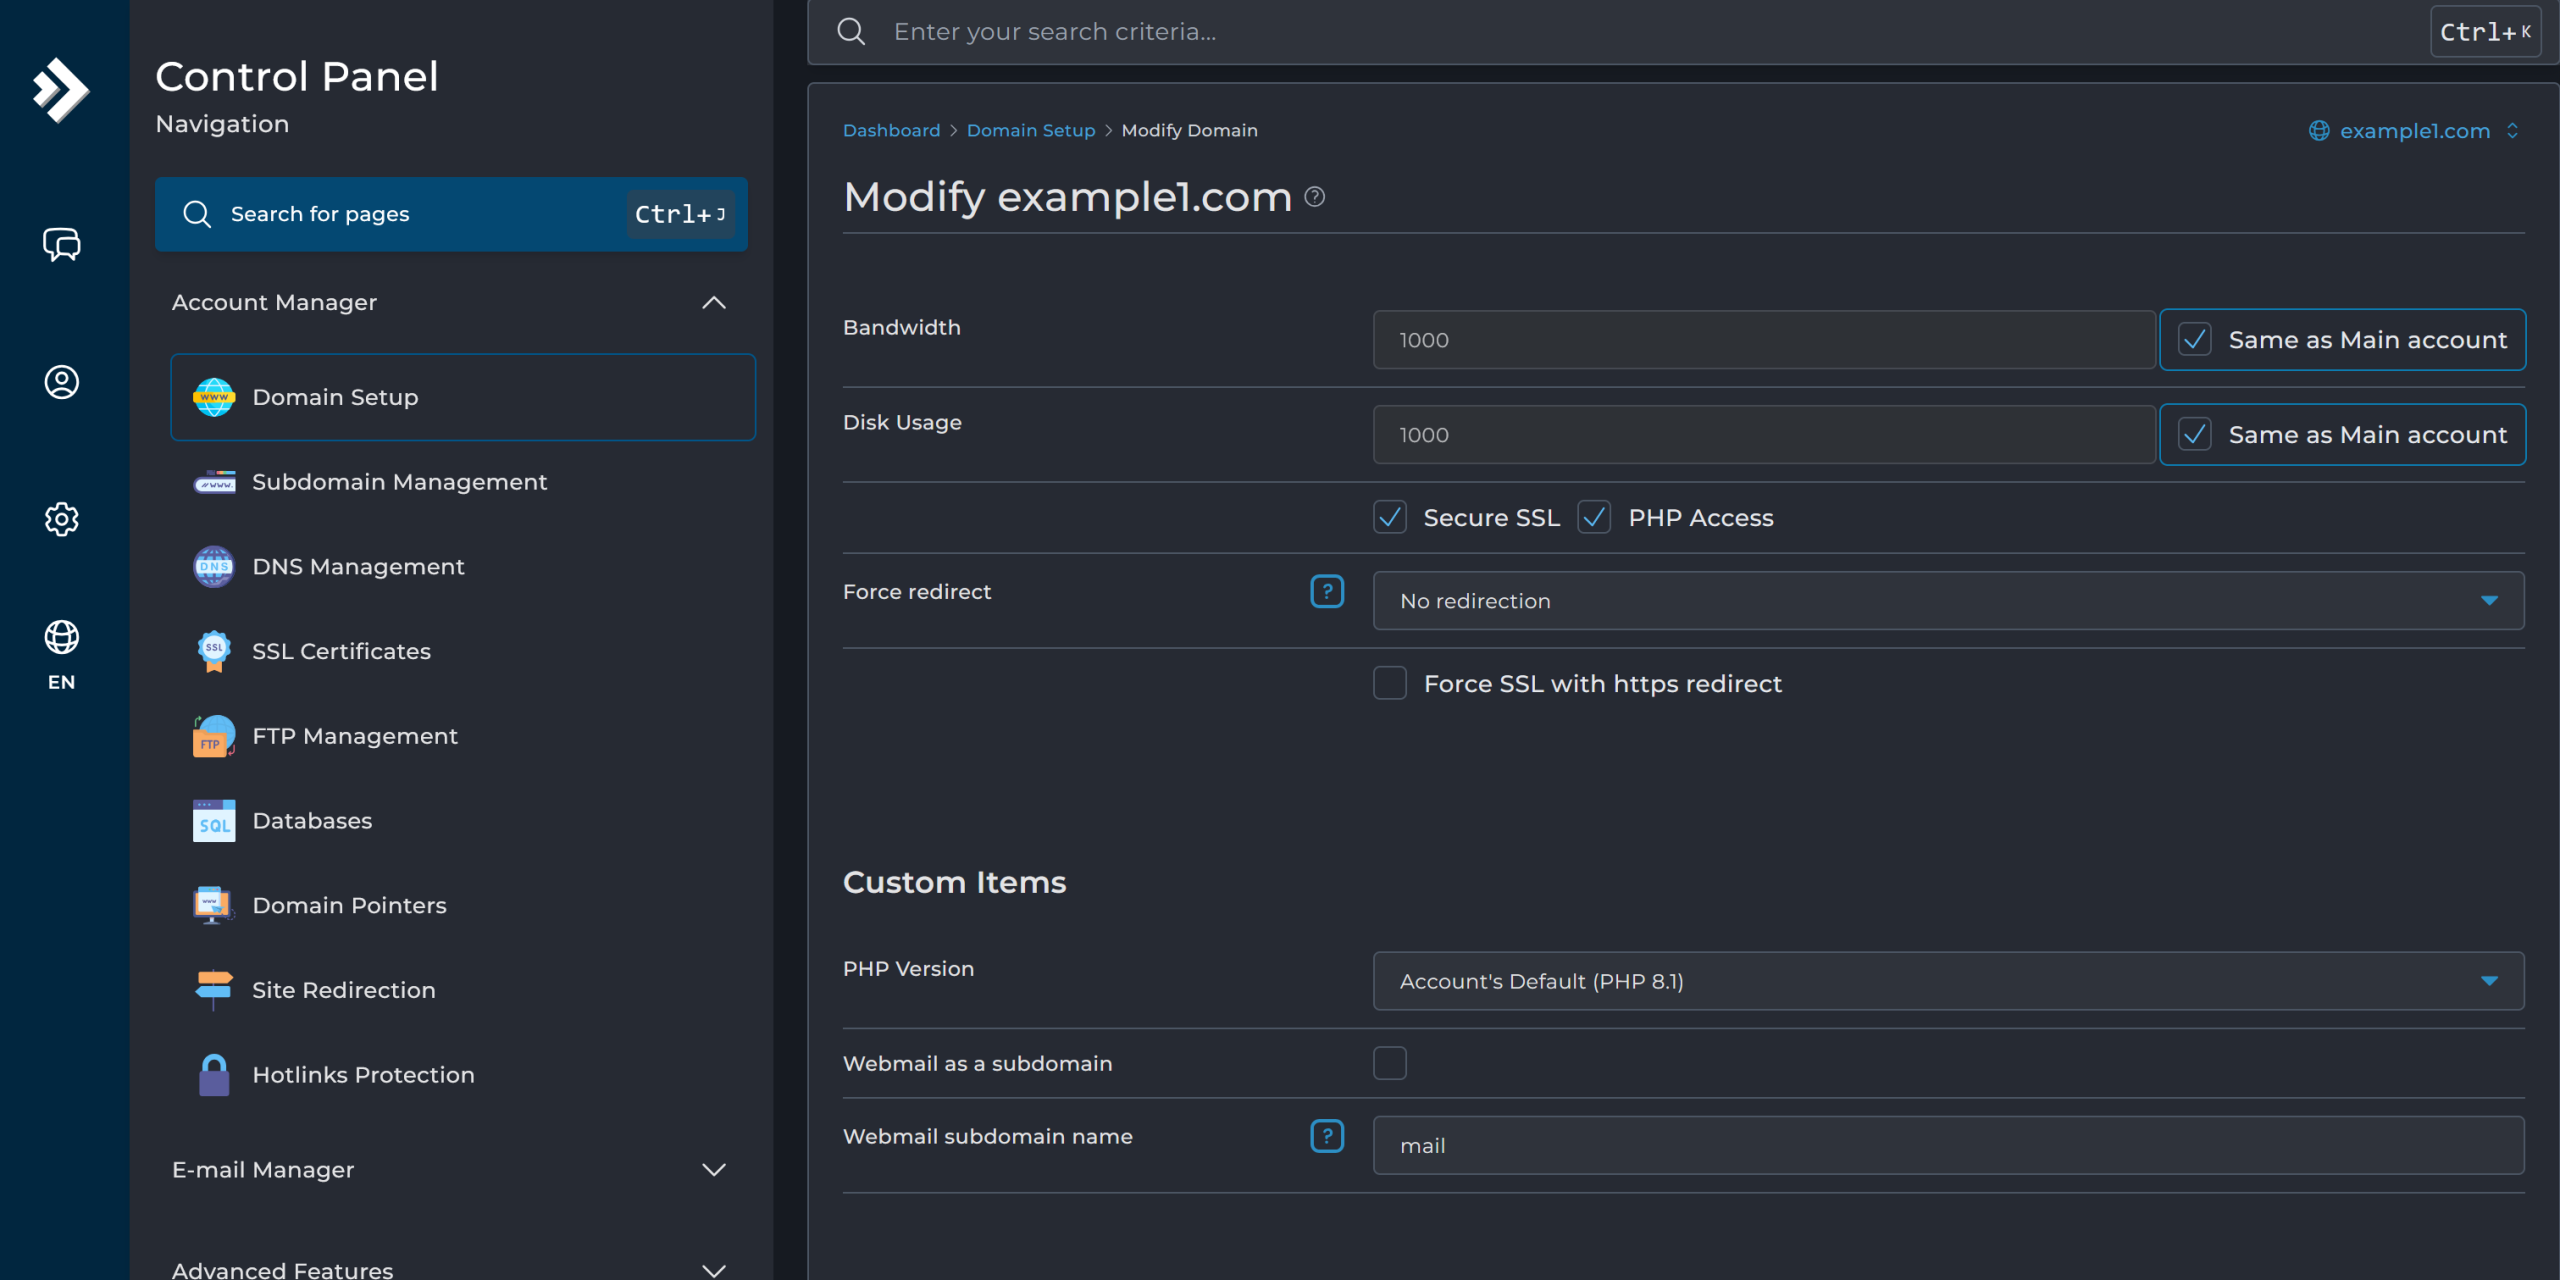
- In the main menu, go to the Account Manager section.
- Click on Domain Setup.
- You will see a list of your domains. Click on the name of the domain you want to change the PHP version for.
- On the domain settings page, scroll down until you see the PHP Version dropdown menu.
- From the dropdown, choose the PHP version you want.
- Click the Modify button at the bottom of the page.
The change usually takes effect within 1–2 minutes. After that, refresh your website to check if everything works correctly.
Important warning Make sure your website is compatible with the new PHP version before you switch. If the version is not compatible, your site may show serious errors, stop loading completely, or behave strangely (blank pages, broken features, etc.).
To avoid problems:
- Ask your website developer or designer to confirm that your site (including themes, plugins, scripts, or custom code) works with the new version.
- If possible, test the new version first on a staging/copy of your site.
- If something goes wrong after the change, you can quickly go back to the old version by repeating the same steps and selecting the previous one.
Changing PHP versions is a very common and safe action when done carefully, it often improves speed and security. Just take a moment to double-check compatibility first.
What is php.ini?
php.ini is the main settings file for PHP. It controls how PHP works on your server — things like memory limits, file upload sizes, security rules, error messages, and more. It’s basically the “brain” that decides PHP’s behavior.
In shared hosting like AxSpace, you usually can’t edit the main php.ini file (the server keeps it locked for safety).
No worries! You can still change many settings just for your own website by creating a file called .user.ini. This file acts like your personal override and applies only to the folders where you put it.
Quick examples of common changes people make:
- memory_limit = 256M → Allow scripts to use more memory
- upload_max_filesize = 64M → Let users upload bigger files
- post_max_size = 80M → Handle larger form submissions
- max_execution_time = 300 → Give slow scripts more time to run
- display_errors = Off → Hide error messages from visitors (safer for live sites)
How to create .user.ini in DirectAdmin on AxSpace
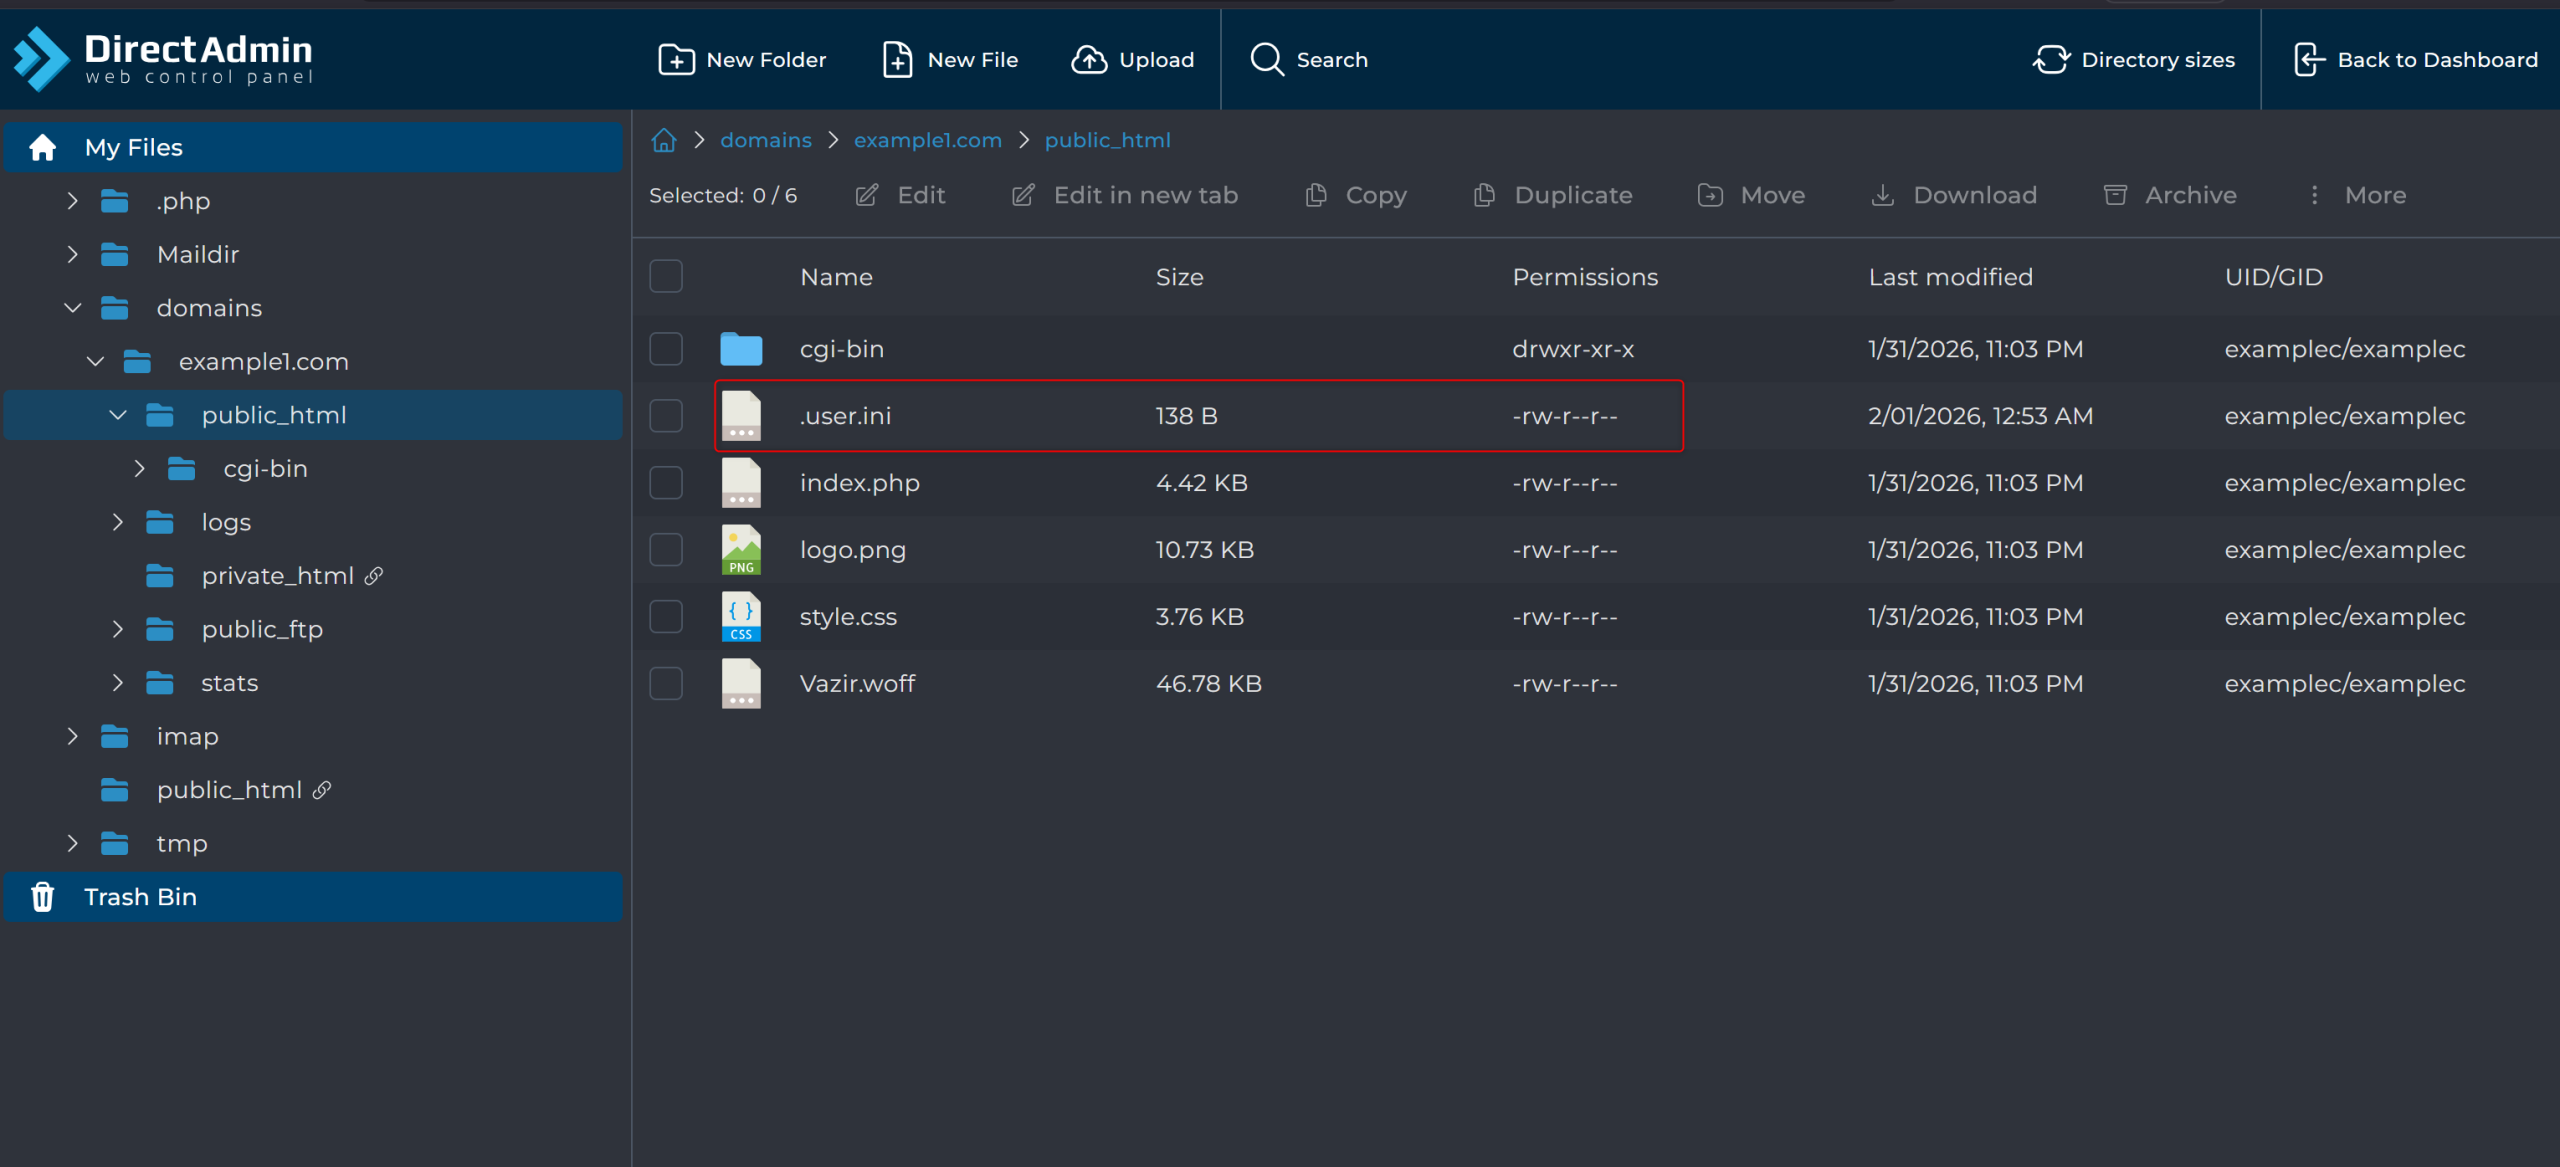
- In the DirectAdmin panel, go to File Manager.
- Open the public_html folder (or the folder where your website files are located).
- Click New File.
- Name the file exactly: .user.ini (It must start with a dot — no spaces!
Now open the .user.ini file and add the settings you want. Below are the most common and
useful ones — just copy and paste the lines you need:
Show error messages (great for finding problems) When installing themes/plugins or after updates, you might see a white screen. Turn errors on temporarily to see what’s wrong:
”
display_errors = On
display_startup_errors = On
”
- Useful during development or troubleshooting.
- For a live website, change to Off so visitors don’t see sensitive info.
Increase memory limit Many sites (especially WordPress with lots of plugins) need more memory:
”
memory_limit = 256M
”
Allow bigger file uploads Fix the common “file too large” error when uploading photos, themes, or backups:
”
upload_max_filesize = 100M
post_max_size = 100M
”
- post_max_size should be the same or bigger than upload_max_filesize.
Give scripts more time to run For slow imports, big updates, or heavy tasks:
”
max_execution_time = 200
max_input_time = 200
”
(Both values are in seconds.)
Increase max input variables Fixes errors like “max_input_vars limit reached” when saving big forms or menus in WordPress:
”
max_input_vars = 10000
”
(Default is usually 1000 — 10000 is safe for most sites. If you need more, contact AxSpace support.)
Extra tip for post size If you’re allowing very large uploads, make sure post_max_size is bigger:
”
post_max_size = 250M
”
How to check if your changes worked
- In the same folder, create a new file called test.php (or any name ending with .php).
- Put this code inside:
”
<?php phpinfo(); ?>
”
- Visit yourdomain.com/test.php in your browser.
- Search (Ctrl+F) for the setting you changed (e.g., memory_limit, upload_max_filesize). You should see your new value.
Important reminders
- Changes usually take effect in seconds to 1 minute.
- If your site breaks, delete or rename .user.ini to turn everything back to default.
- Some very strict settings can only be changed by the server admin — if a setting doesn’t apply, open a ticket with AxSpace.
- Always test on a copy of your site first if possible.
Summary In this guide, we explained how to switch PHP versions and how to customize important PHP settings using .user.ini — even when you can’t touch the main php.ini file. These simple changes help your site run faster, accept bigger files, handle more data, show (or hide) errors, and avoid common problems.
Mastering these tweaks makes your website more reliable and user-friendly.
If you run into any trouble while editing .user.ini, feel free to ask — just leave your question in the comments or open a support ticket with AxSpace.